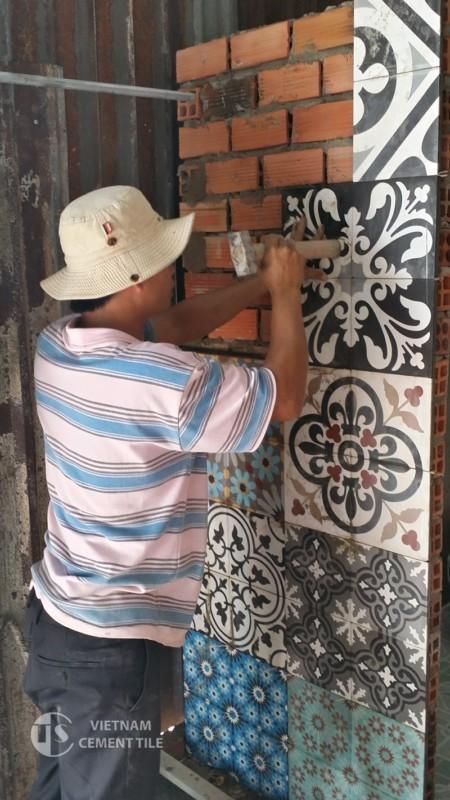
Please note that this is not a complete guide to installation and maintenance but some advice on aspects which we from our experience have found to be particularly important.

Installation Guide
- Once received, please Inspect your order carefully throughout the installation process and handling be careful not to damage the corners and finished surface of the tiles.
- Store material in a dry area. Moisture can cause the tiles to fade or stained color from moisture coming through from the bottom of the tile.
- Cement Tile, is subject to color and tonal variations and may require blending of tiles. For best results, we recommend to shuffle tile from different boxes during installation to achieve a uniform effect. Allow interior tiles to adjust in their final environment prior to installation.
- Tiles are a cement-based product and may have residue on the surface. This will be removed during the cleaning and buffing after the installation. Using a sponge, wet the back of the tile completely to enable the thin set to adhere to the tile.
- Install over level, flat and stable surface or suitable stable sub-floor. Wall installation on drywall is acceptable as well.
- Use a high quality thin-set adhesive (such as Laticrete or Mapei product). Follow adhesive manufacturer’s instructions. Cement Tiles are not intended for installation with large quantities of water. Do not install during extreme hot or cold weather.
- Make sure that adhesive is applied to the full back of each tile using a large notch trowel (At least 1/2” notched trowel). Spread floor and also back butter the tiles like a natural stone installation. Make sure all tiles are level. Do not beat with a mallet or rubber hammer to set tiles, level your tiles using hand pressure. Remove excess adhesive from the surface with a damp cloth or sponge while it is fresh. Tiles should be cut using a sharp diamond blade in conjunction with water to avoid chipping of edges.
Note: These installation instructions are offered as guidelines only. CTS will not be held responsible for errors, problems or issues due to installation.
Grout & Sealer
- Our Cement tiles are pre-sealed at the factory with 2 coats of sealer.Therefore, another layer of sealer is not necessary. One layer of sealer may be applied after cleaning and before grouting. This acts as a grout release to prevent the tiles from being stained with grout. Do not use any acids to clean tiles. Use a PH neutral cleaner.
- Allow two (2) to three (3) days for sealer to cure after tiles are laid before grouting of joints.
- Use Laticrete, Mapei or equivalent un-sanded grout, using manufacturer’s instructions. Recommended grout joint width is a tight joint of 1/16″ – 1/8″. Joints should be full and free of all voids and pits. Grout should be applied in small areas and immediately cleaned. Do not spread the entire floor with grout like a porcelain or ceramic tile. Once grout has been applied and starts to dry, remove excess grout immediately. Grout that sits too long can be difficult to remove from the tile. Do not affix duct tape, gaffer tape or acid tape directly onto cement tiles surface. Tape can discolor or stain your cement tiles. Typically cement tile is grouted with white or light colored grout. If you decide to use colored grout we recommend that it be a color that is the same, or lighter than, the lightest color used in the pattern. Note: Take special care when using black or dark grout. Although they can be used, dark grouts can stain lighter colors on the tile and be very difficult to remove after installation.
- After installation, wash floor with a neutral detergent. Any extra residue or mortar should be removed immediately. Do not allow water or other liquids to spot, pond or ring on the surface of smooth tiles (ie: Do not leave spillages, drips or wet buckets, cups, footmarks, etc. on the surface at any time). For hard to remove residue, a single disc floor machine with a white pad may be used.
- Seal the clean floor, including grout, a second time with the penetrating sealer.
Maintenance
- Cover the tile immediately after completion with a protective covering to prevent damage during the remainder of construction.
- For ongoing maintenance, clean regularly with a neutral detergent and buff tiles with a white pad. Extremely heavy foot traffic may require additional maintenance. A natural patina will occur as the floor is maintained and wears. Water spotting will be eliminated through an ongoing maintenance routine.
- The use of properly sized walk-off mats at entrances and sweeping or dust mopping is important to remove abrasive grit that may cause wear.
- Please contact us with any question, before cutting or installing tiles.
Note: These maintenance instructions are offered as guidelines only. CTS will not be held responsible for errors, problems or issues due to installation.